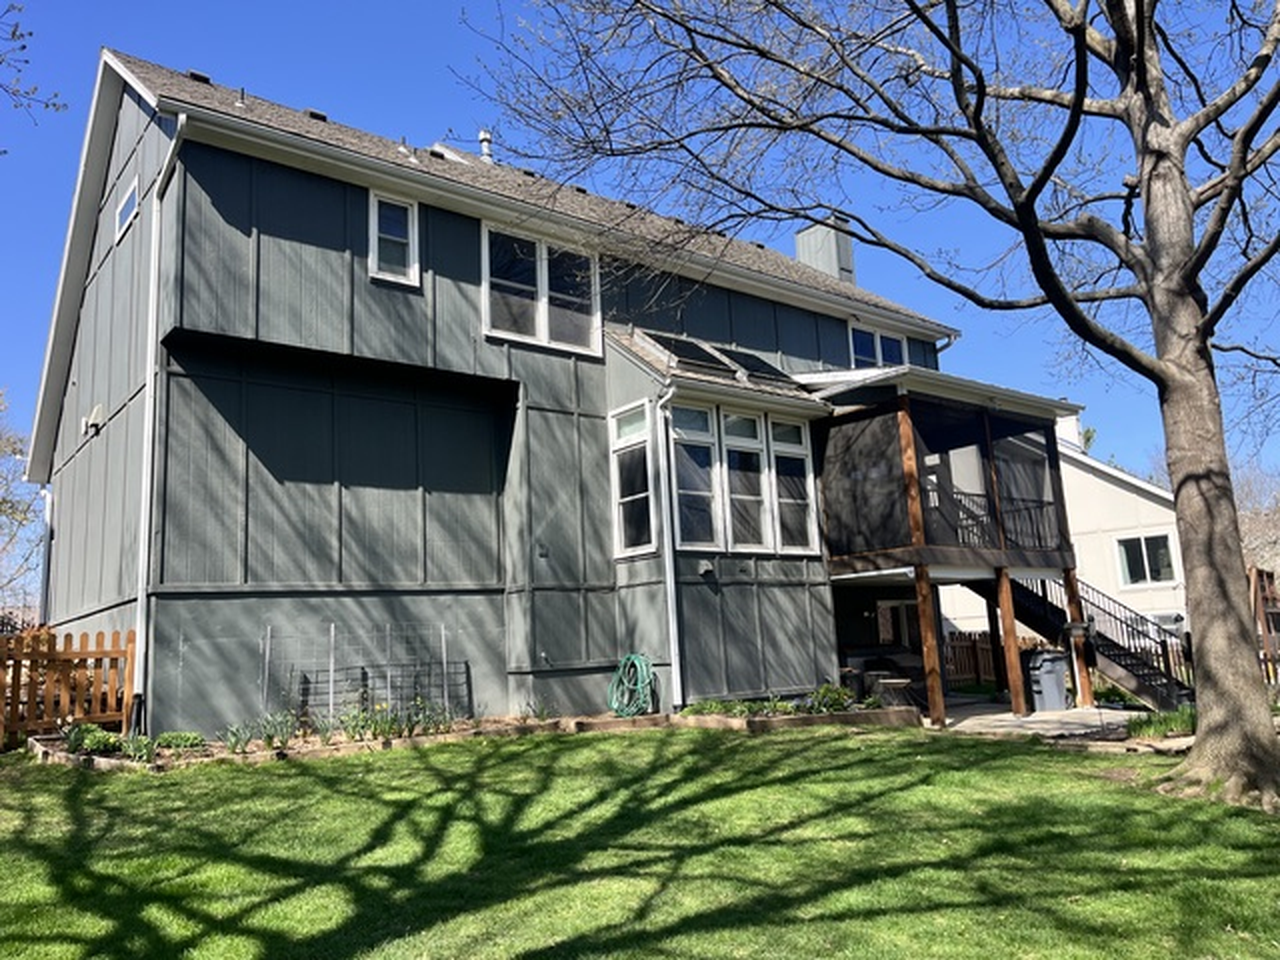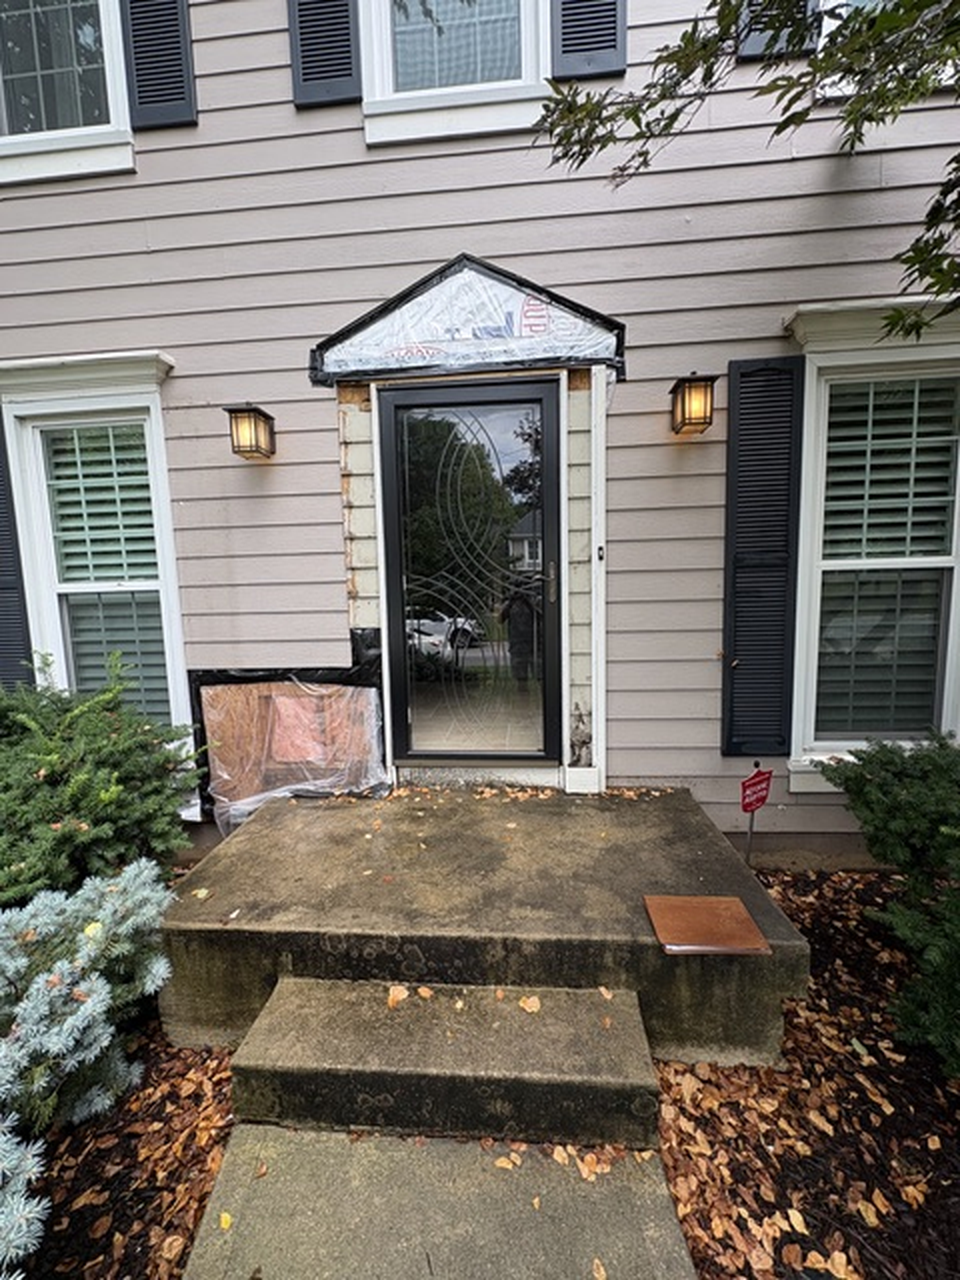
Project case study: Adam K., Olathe, Kansas. Cover photo shows the entry before repair; final storm-door installation and completion photo are pending.
A front door that leaks is not always just a door problem.
For Adam K., a homeowner in Olathe, Kansas, water damage around the front entry had progressed into the structure below the door. What initially appeared to be a flashing and trim problem ultimately required structural repair, a new water-management system, new siding and trim, and replacement of both the entry door and storm door.
By the time Acumen Renovations became involved, another handyman had already begun removing siding and trim to investigate the damage. Once the assembly was opened, the project proved to be more involved than the original repair.
Our job was to determine how water had been getting into the entry, repair the damage it had caused, and rebuild the opening with multiple layers of protection instead of depending on one joint or bead of sealant to keep water out.
The Starting Condition
The home had fiber-cement siding around the front entry, with older siding visible underneath portions of the wall assembly.
Water damage was concentrated around the door, and the initial concern was improper or missing flashing. With siding and trim already removed, we could see deterioration around the lower portion of the opening. One damaged area was open far enough that you could see into the basement from outside.
After evaluating the assembly, we determined that there was not one isolated failure.
The water intrusion was related to a combination of the aging entry door, the way the framing and trim detail above the door had been constructed, and a lack of redundant water-management layers around the opening.
That last part was important.
Exterior doors should not depend on one bead of caulk to keep the structure dry. The flashing, sill, sealants, trim, siding, and drainage plane should work together so that if water gets past one layer, another layer directs it back toward the exterior.
The Damage Went Beyond the Trim
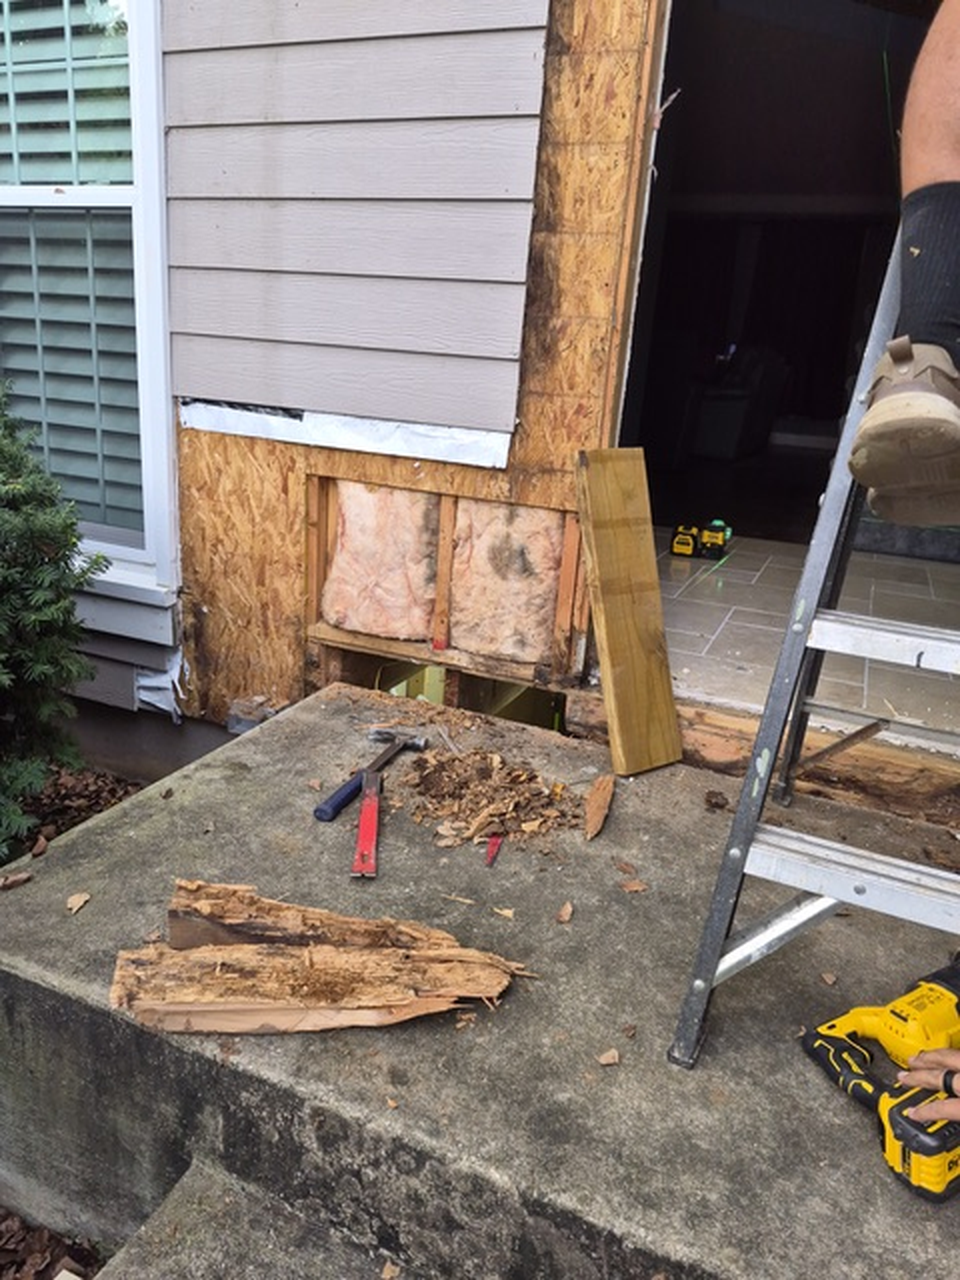
Once the entry was opened far enough to evaluate the structure, we found that the deterioration extended below the door.
About 6 inches of the rim board had rotted completely through.
Rather than replacing only the visibly failed section, we removed and replaced approximately 2 feet of rim board so the repair extended into sound material on both sides of the damage.
The boxing and subfloor beneath the door were also damaged and had to be replaced.
At that point, simply installing a new door would not have solved the problem. We first needed to rebuild a solid structural opening.
Repairing the Structure First
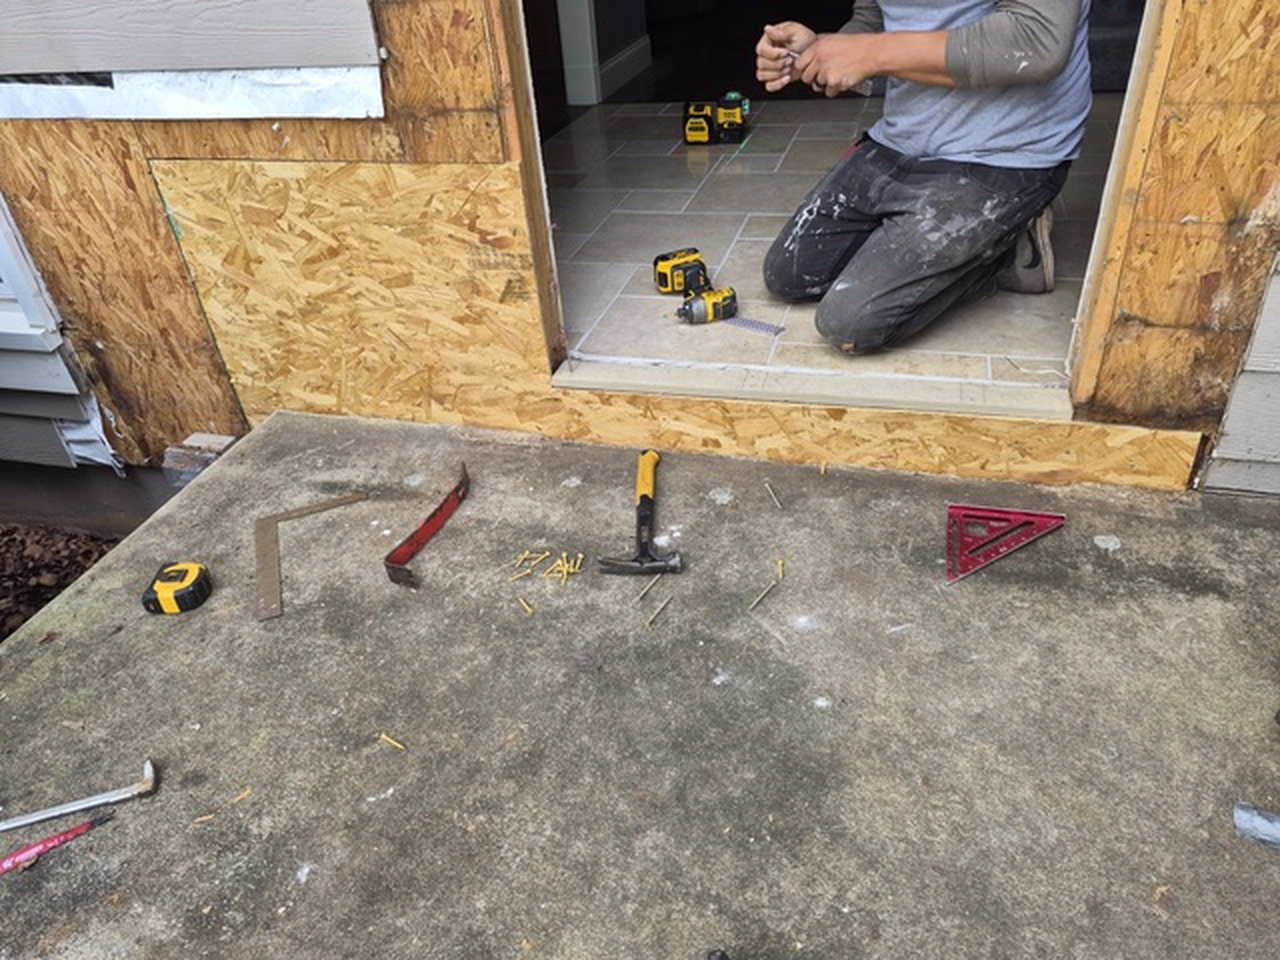
We removed the deteriorated material and replaced the affected rim board, boxing, and subfloor beneath the entry.
We also backfilled the space between the boxing and concrete with foam before beginning the flashing and door installation.
This part of the project is mostly invisible in the finished result, but it was some of the most important work we performed.
When water damage reaches the structure around an exterior opening, covering it with new trim does not make the problem go away. The damaged material needs to be addressed before the exterior assembly is rebuilt.
Building Redundancy Into the New Sill
Once the structure was repaired, we rebuilt the bottom of the opening with multiple overlapping layers of water protection.
We fabricated custom flashing with a 4-inch leg and back-caulked it before installation. That flashing was integrated with ZIP System flashing tape, and the sill pan overlapped the flashing.
The purpose of that sequence was straightforward: if incidental water ever makes its way beneath the threshold, there are multiple layers designed to keep it from reaching the repaired rim board and subfloor.
That was one of the major differences between the assembly we removed and the one we installed.
Installing the New Therma-Tru Entry Door
Adam selected a Therma-Tru Smooth-Star S210 six-panel fiberglass entry door.
The 3'0" × 6'8" left-hand inswing unit included:
- 5-9/16-inch primed Dura-Frame jamb
- Dura-Frame brickmould exterior trim
- Bronze compression weatherstripping
- Tru Defense adjustable sill
- Brushed-nickel ball-bearing hinges
- Satin-nickel peephole
- Double-bore preparation for the lockset and deadbolt
The supplier documentation lists a 38-1/4-inch × 82-inch rough opening for the door assembly.
We installed the door following the applicable Therma-Tru and OSI installation details, integrating it with the new sill and flashing system rather than treating it as a stand-alone replacement.
Rebuilding the Detail Above the Door
The area above the door presented a different challenge.
Part of the original architectural detail had been removed, leaving a substantial gap between the new door assembly and the siding above it.
We used 8-inch LP SmartSide trim to bridge that area and fabricated a custom crown detail to restore the transition above the entry.
The crown was not installed as decoration alone.
We incorporated custom flashing with the upper trim detail so water reaching that area would have a path back to the exterior rather than being able to migrate behind the trim.
That detail addressed one of the conditions that had contributed to the original water problem.
Repairing the Fiber-Cement Siding
We installed new Allura fiber-cement lap siding around the repaired area.
The 8-1/4-inch siding allowed us to maintain the approximately 7-inch exposure of the existing siding.
We also maintained the necessary spacing where siding and trim met and used compatible sealant and backer rod where needed.
The new siding and exterior trim were left primed and ready for paint. Painting was not part of Acumen's scope on this project.
Finishing the Interior
Inside the home, we installed new 2 1/4-inch colonial casing around the replacement door.
The new trim was installed primed, the fastener holes were wood-filled, and the joints were caulked. It was then left ready for final paint.
The Storm Door Is the Remaining Completion Step
The planned storm door is a bronze Gerkin 905 fixed full-view model with a lower vent. The first door supplied had a universal hinge configuration. We prefer a unit manufactured for the required hinge direction, so that door was not installed.
The correct left-hinged storm door is still pending installation. We will add the completed-entry photograph once it is installed.
The First Real-World Test Came Quickly
Heavy rain moved through the area in the days following the primary repair.
Adam did not report any water intrusion at the repaired entry afterward.
One period of heavy rain is not a guarantee of future performance, but it provided an immediate real-world check after rebuilding an opening that had previously suffered significant water damage.
What This Front Door Repair Ultimately Required
What began as a suspected flashing problem turned into a much broader repair.
The repair scope included:
- Removing deteriorated material around the entry
- Replacing approximately 2 feet of rim board, including the roughly 6-inch section that had rotted completely through
- Replacing damaged boxing
- Replacing damaged subfloor beneath the door
- Backfilling between the boxing and concrete with foam
- Fabricating and back-caulking custom sill flashing
- Integrating the flashing with ZIP System flashing tape
- Installing an overlapping sill pan
- Installing a Therma-Tru Smooth-Star fiberglass entry door
- Rebuilding the upper entry detail with 8-inch LP SmartSide trim
- Fabricating a custom crown detail
- Adding custom flashing to the upper trim assembly
- Installing new Allura fiber-cement lap siding
- Installing new 2 1/4-inch colonial interior casing
- Selecting a left-hinged Gerkin 905 storm door, with installation pending
No permit was required for this scope of work.
From the outside, the finished project is a repaired front entry with a new entry door, siding, and trim; the storm door remains the final installation step.
Much of the work that mattered most is now hidden.
The repaired rim board, subfloor, sill pan, custom flashing, flashing tape, and details behind the crown trim are what separate this project from simply removing an old door and putting a new one in the opening.
What Homeowners Can Learn From This Project
Water damage around a door does not necessarily tell you where the water first entered.
Soft trim, deteriorated siding, damaged flooring, or staining around a threshold can be symptoms of a problem somewhere else in the assembly.
In this Olathe home, conditions above the door contributed to damage that eventually showed up below it.
That is why we approach this type of repair by following the water path before deciding what needs to be replaced.
Once water has reached the framing, the goal should not be to cover the opening back up as quickly as possible. The better approach is to repair the damaged structure first and then rebuild the opening so the flashing, door, siding, trim, and sealants work together.
Need Help With a Door or Water-Damage Repair?
Acumen Renovations installs exterior doors and handles the framing, flashing, siding, and trim repairs that can come with more complicated replacement projects.
We serve homeowners throughout Olathe and the Kansas City metro on both sides of the state line.
If you are seeing water damage around an exterior door or are unsure how far the problem extends, Schedule a Consultation to have the opening evaluated before deciding on the repair.
For more on the installation details, read our exterior door installation guide and explore our door installation services.