What is the most common deck railing failure?
Post attachment. Tearing decks down, we find the same two things over and over: wood posts with no meaningful blocking behind them, and posts fastened straight to siding. Posts on siding are the worse of the two, they hold nothing, they make that wall impossible to maintain, and they void virtually every siding warranty. Second most common is loose balusters, which is almost always a bottom rail that bowed down because nobody put crush blocks under it.
How high does a deck railing have to be?
36 inches residential, 42 inches commercial. It's enforced locally and can vary across the KC metro, so confirm it for your address before the railing is designed.
How far apart should deck balusters be?
The gap ceiling is 4 inches. We lay out at 4 inches on center on deck sections, 4½ on stairs, and we target an actual gap of 3.5 inches, a half inch inside the limit, so wood movement can't push it out of compliance.
Does the brand of deck railing matter?
Less than you'd think. We've installed DekPro, Fortress, Deckorators, and Westbury. Finish quality is good across all of them and they perform about the same on safety. What separates them is selection, custom flexibility, and what your installer's certification adds to the warranty.
Can you replace railing on an existing deck with aluminum?
Usually, but aluminum posts need specific blocking that almost certainly isn't in there. If your deck is at least 3 feet off the ground we add it from underneath and it's a fairly easy retrofit. Lower than that and we're pulling deck boards to get at the framing from above.
We tear decks down for a living. Not as often as we build them, but often enough that I've seen the inside of a lot of railings that looked perfectly fine from the outside right up until the moment we took them apart.
Two things show up almost every time.
The first is blocking that isn't really blocking. Somebody set a wood post against the rim joist, ran a couple of lag screws through it, and called it done, or put in a scrap of lumber behind it that satisfies the idea of blocking without doing the structural work of blocking. The second is worse: posts fastened directly to siding. No connection to framing at all. The railing is hanging on a piece of cladding that was never designed to hold anything.
And the structural problem is only the first of three.
The second is that you've just made that section of your house unmaintainable. Siding is a system that gets repaired, replaced, and worked on over the life of a home. Bolt a railing through it and that wall is locked. Nobody can pull a board, chase a rot repair, or replace a damaged course without dismantling the railing first, which means the next contractor either charges you for the extra work or, more likely, works around it and does a worse job.
The third is the one that costs real money. Penetrating siding improperly voids virtually every siding warranty on the market. Manufacturers are specific about how their product gets fastened and what can be attached through it, and warranty coverage is conditioned on following those instructions. A railing post lagged through your siding is not an installation any manufacturer approved. So the day water gets behind that penetration and starts doing damage, you find out your siding warranty went away the day the railing went on, and nobody told you, because the person who installed it didn't know either.
We've written about how much penetrations complicate a siding job, and this is the same problem arriving from the other direction: a deck decision quietly creating a siding problem.
Here's what I want you to take from that. In both cases the railing looked right. Right height, even balusters, no wobble the homeowner ever noticed. The failure was invisible, sitting behind the post, waiting for the day somebody leaned on it hard enough.
Which brings me to the thing almost nobody tells homeowners about railings: the part you shop for is not the part that fails.
You're Shopping the Wrong Half of the Decision
Walk into any showroom or click through any manufacturer's site and the entire conversation is about the visible half, wood, composite, aluminum, cable, glass. Style. Maintenance. Color. Every one of those pages will tell you a railing is "more than a safety feature" in the opening line and then never mention safety again.
Meanwhile a guard is a life-safety assembly. It exists to keep a person from going over the edge. Every material on that list has to clear the same bar to be legal, and any of them can be built to clear it. So the material choice is a design decision, not a safety decision.
The safety decision is what's behind the post. And you don't get to make that one from a brochure, it's made by whoever builds the deck, usually before you've picked a color.
This is the same pattern we've written about with deck safety issues that get missed and with the mistakes that show up years after a deck is finished. Appearance and structure are two different things, and appearance is the one that gets inspected by the homeowner.
How We Build a Railing Post
Our standard is a 6×6 post, blocked into the decking. Not a 4×4 with a lag screw and hope.
And where we can, we run the post as one continuous piece, up from the ground, through the decking, to railing height. Same post carrying the deck and carrying the rail. When you do that, there is no connection between the railing and the deck frame, because there's nothing to connect. You can't have a connection failure where there's no connection.
That's not always possible. Deck height, existing framing, and layout all affect it. But it's what we're aiming for on every build, and it's the single biggest difference between a railing that's still solid in twenty years and one that's loose in five.
The same logic carries up to the top rail, and this is where most wood railings are built wrong.
Run the Top Rail Over the Posts, Not Between Them
There are two ways to run a wood top rail: cut it into segments that fit between the posts, or run it continuously over the top of them. We almost always run it over.
One single framing member is much sturdier than segments screwed together. Running the rail over the posts ties the whole railing into one continuous piece instead of a series of short sections each depending on its own fasteners. It's stiffer, it moves as a unit, and it takes a lean without flexing at every joint.
It also means the only vulnerable joints left are the corners. Which brings us to the thing that has annoyed me for most of my career.
The Perfect Miter That Opens in Three Months
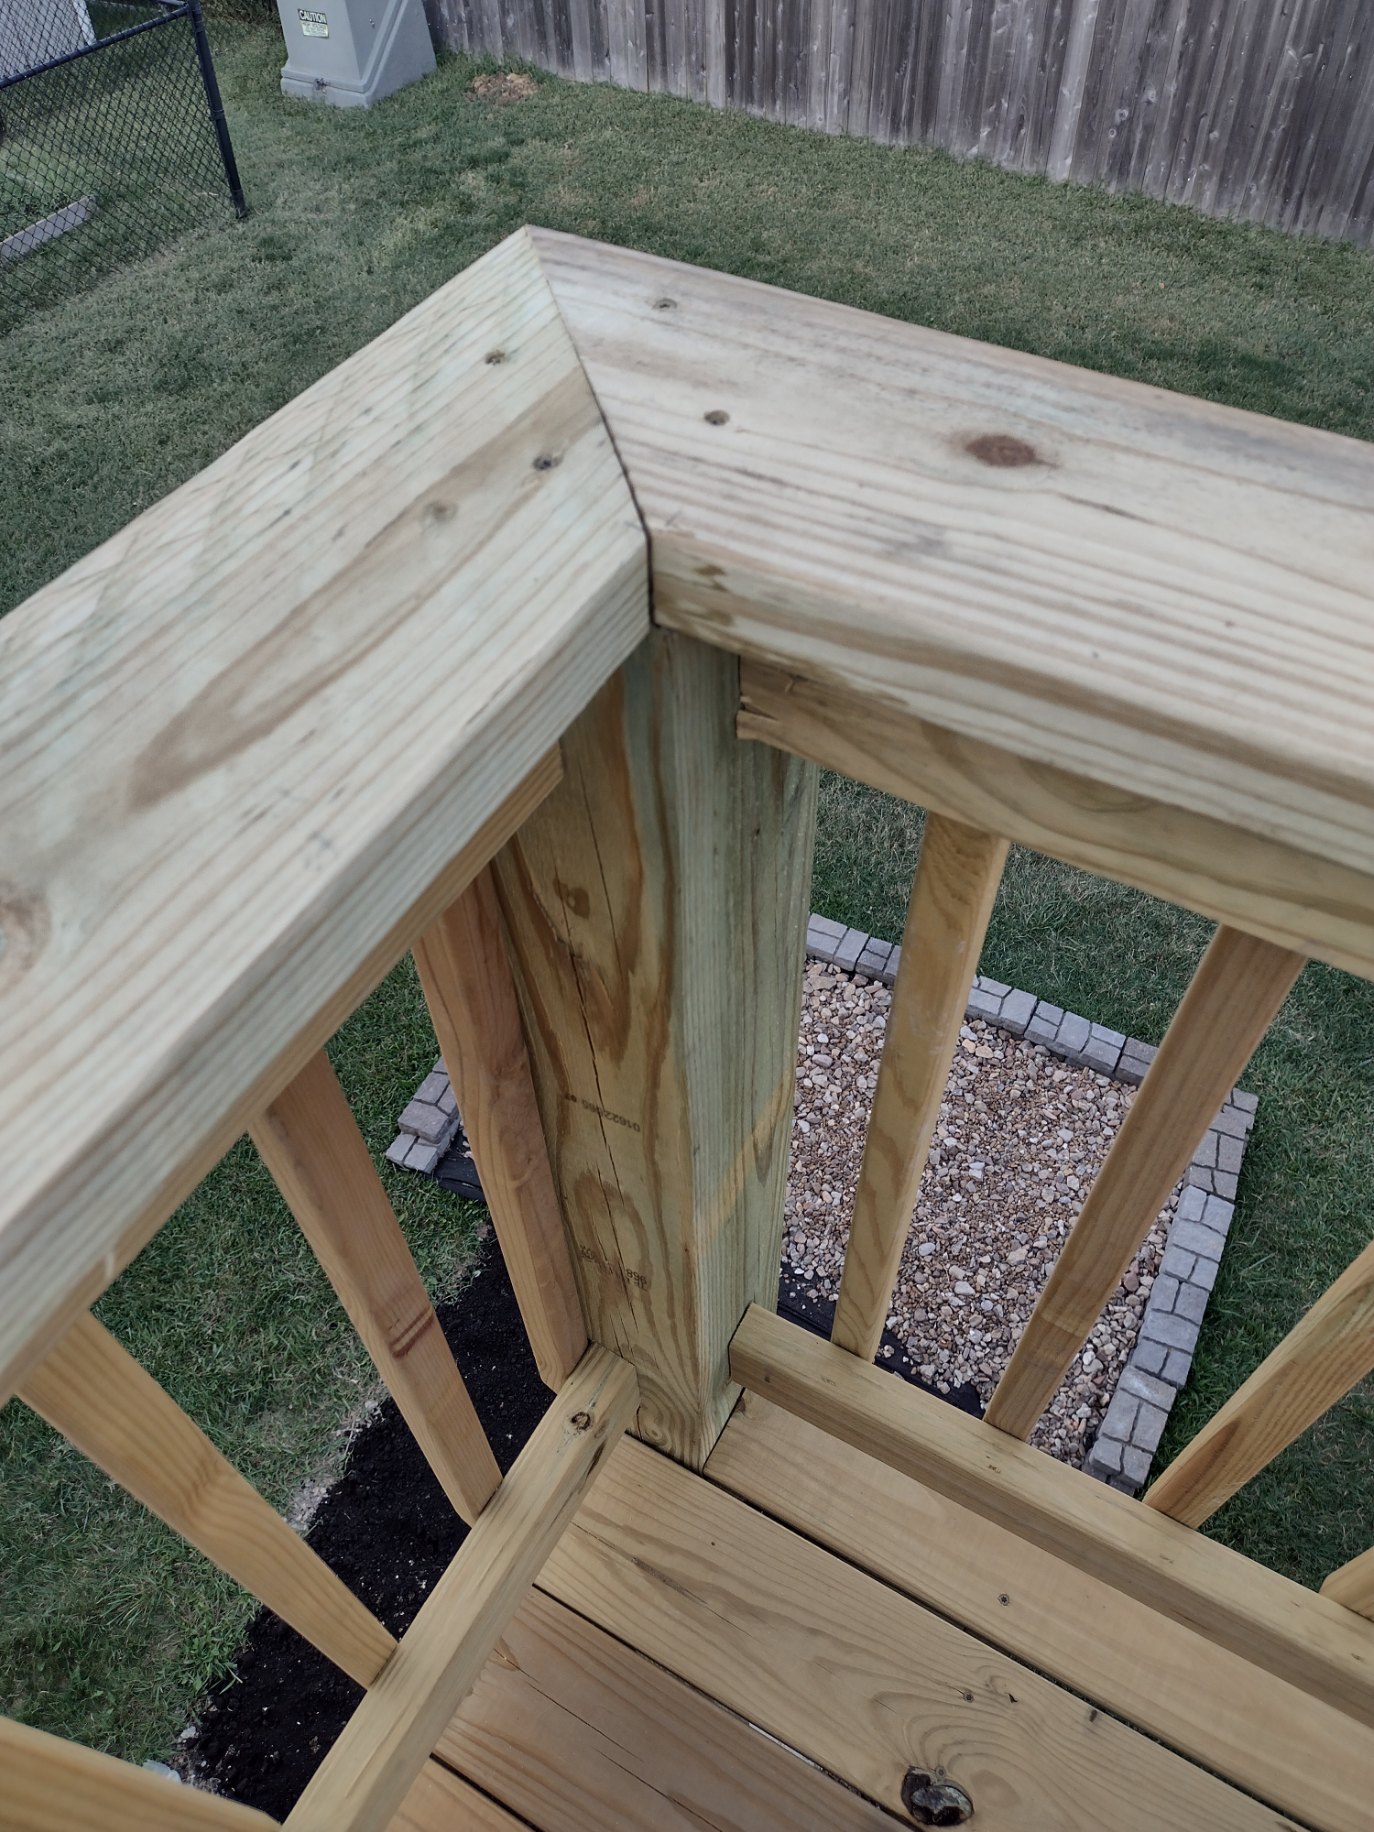
We'll cut a corner miter that's genuinely perfect. Tight, clean, no gap you could get a fingernail into. We'll take a photo of it because we're proud of it.
Three months later it's open and it looks like hell.
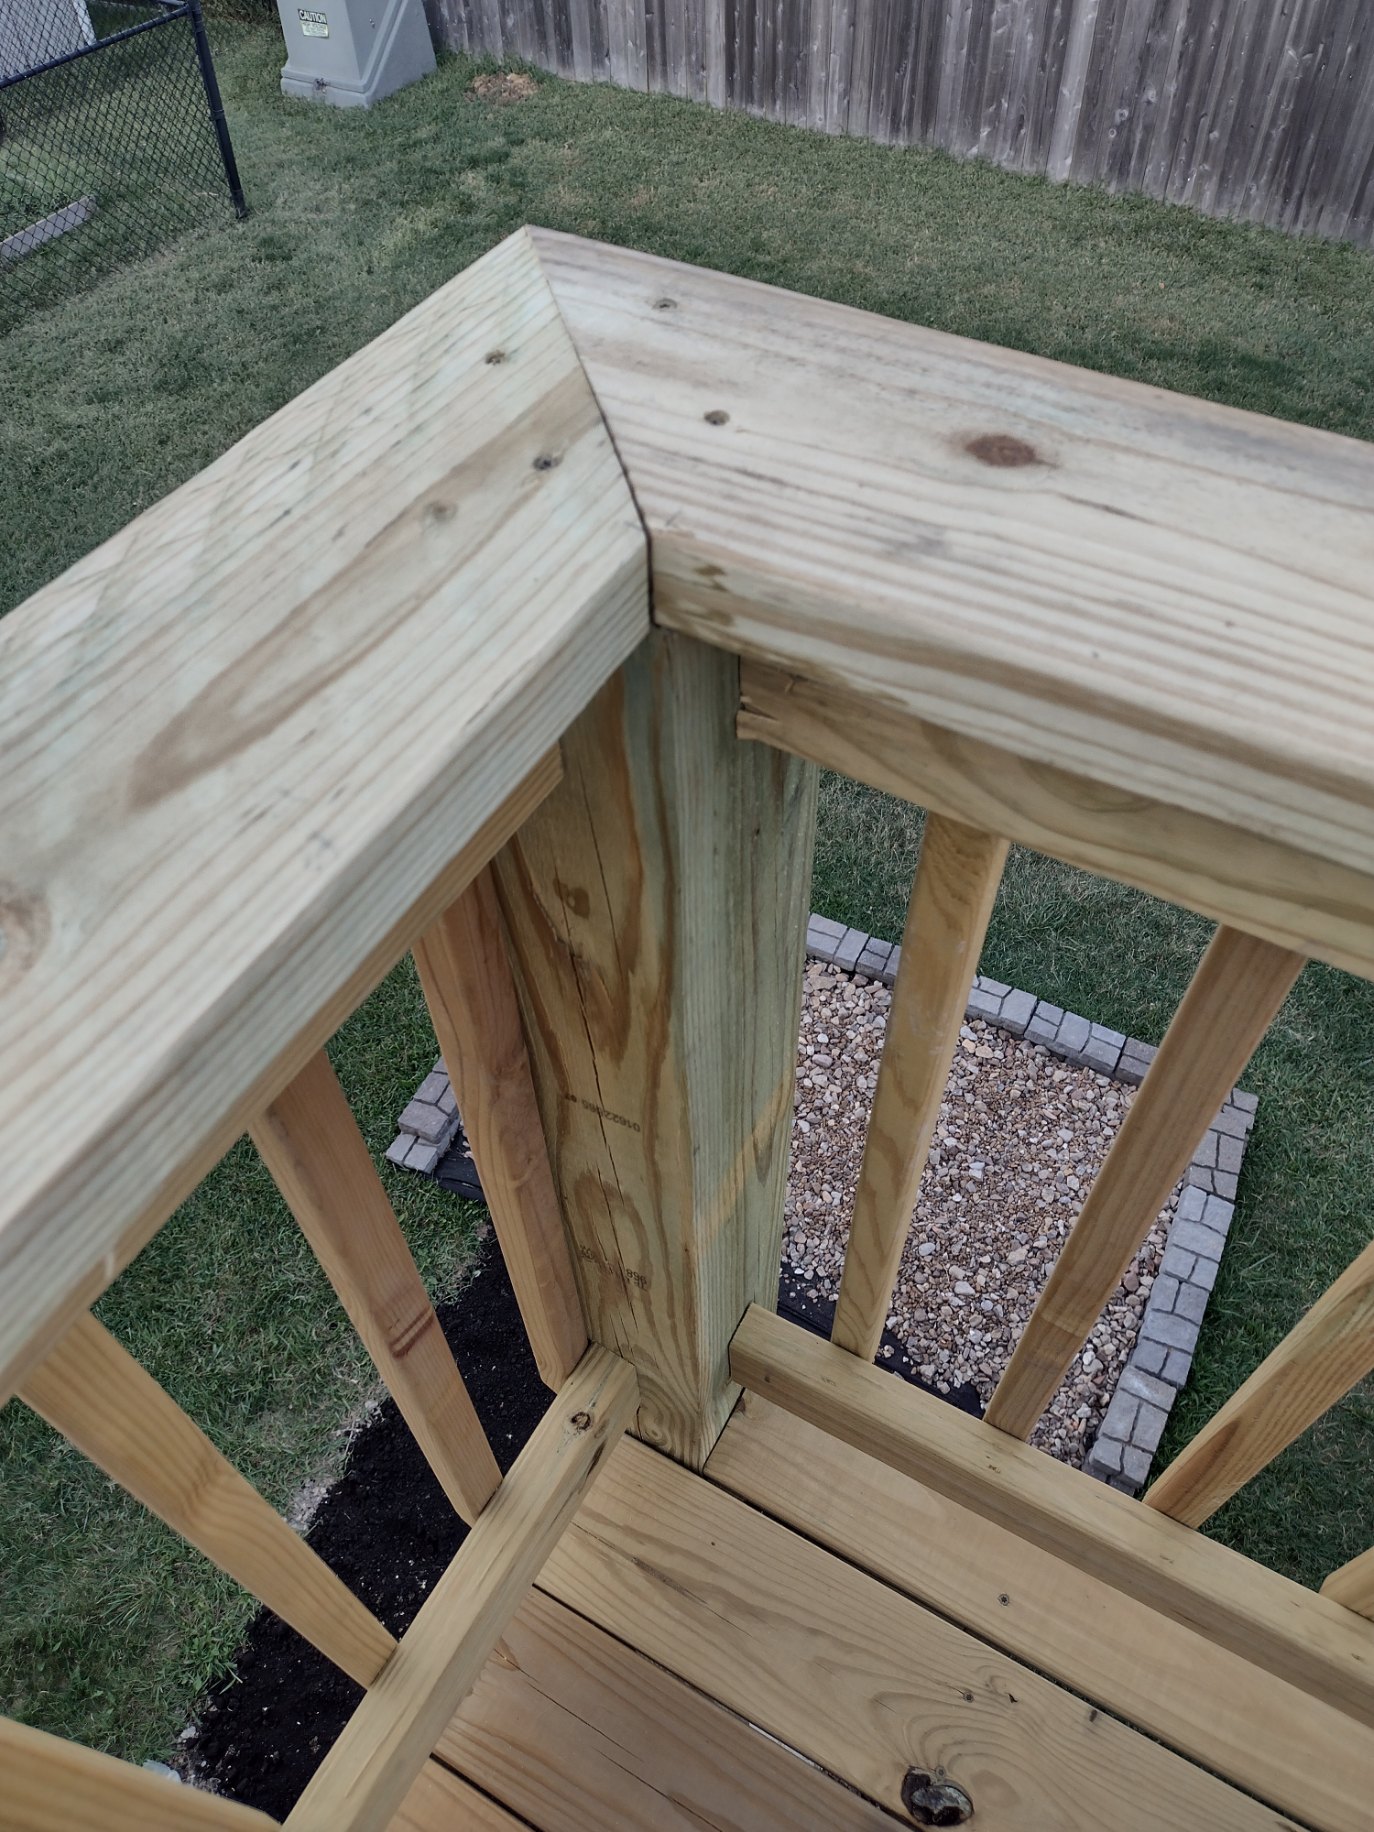 On install day
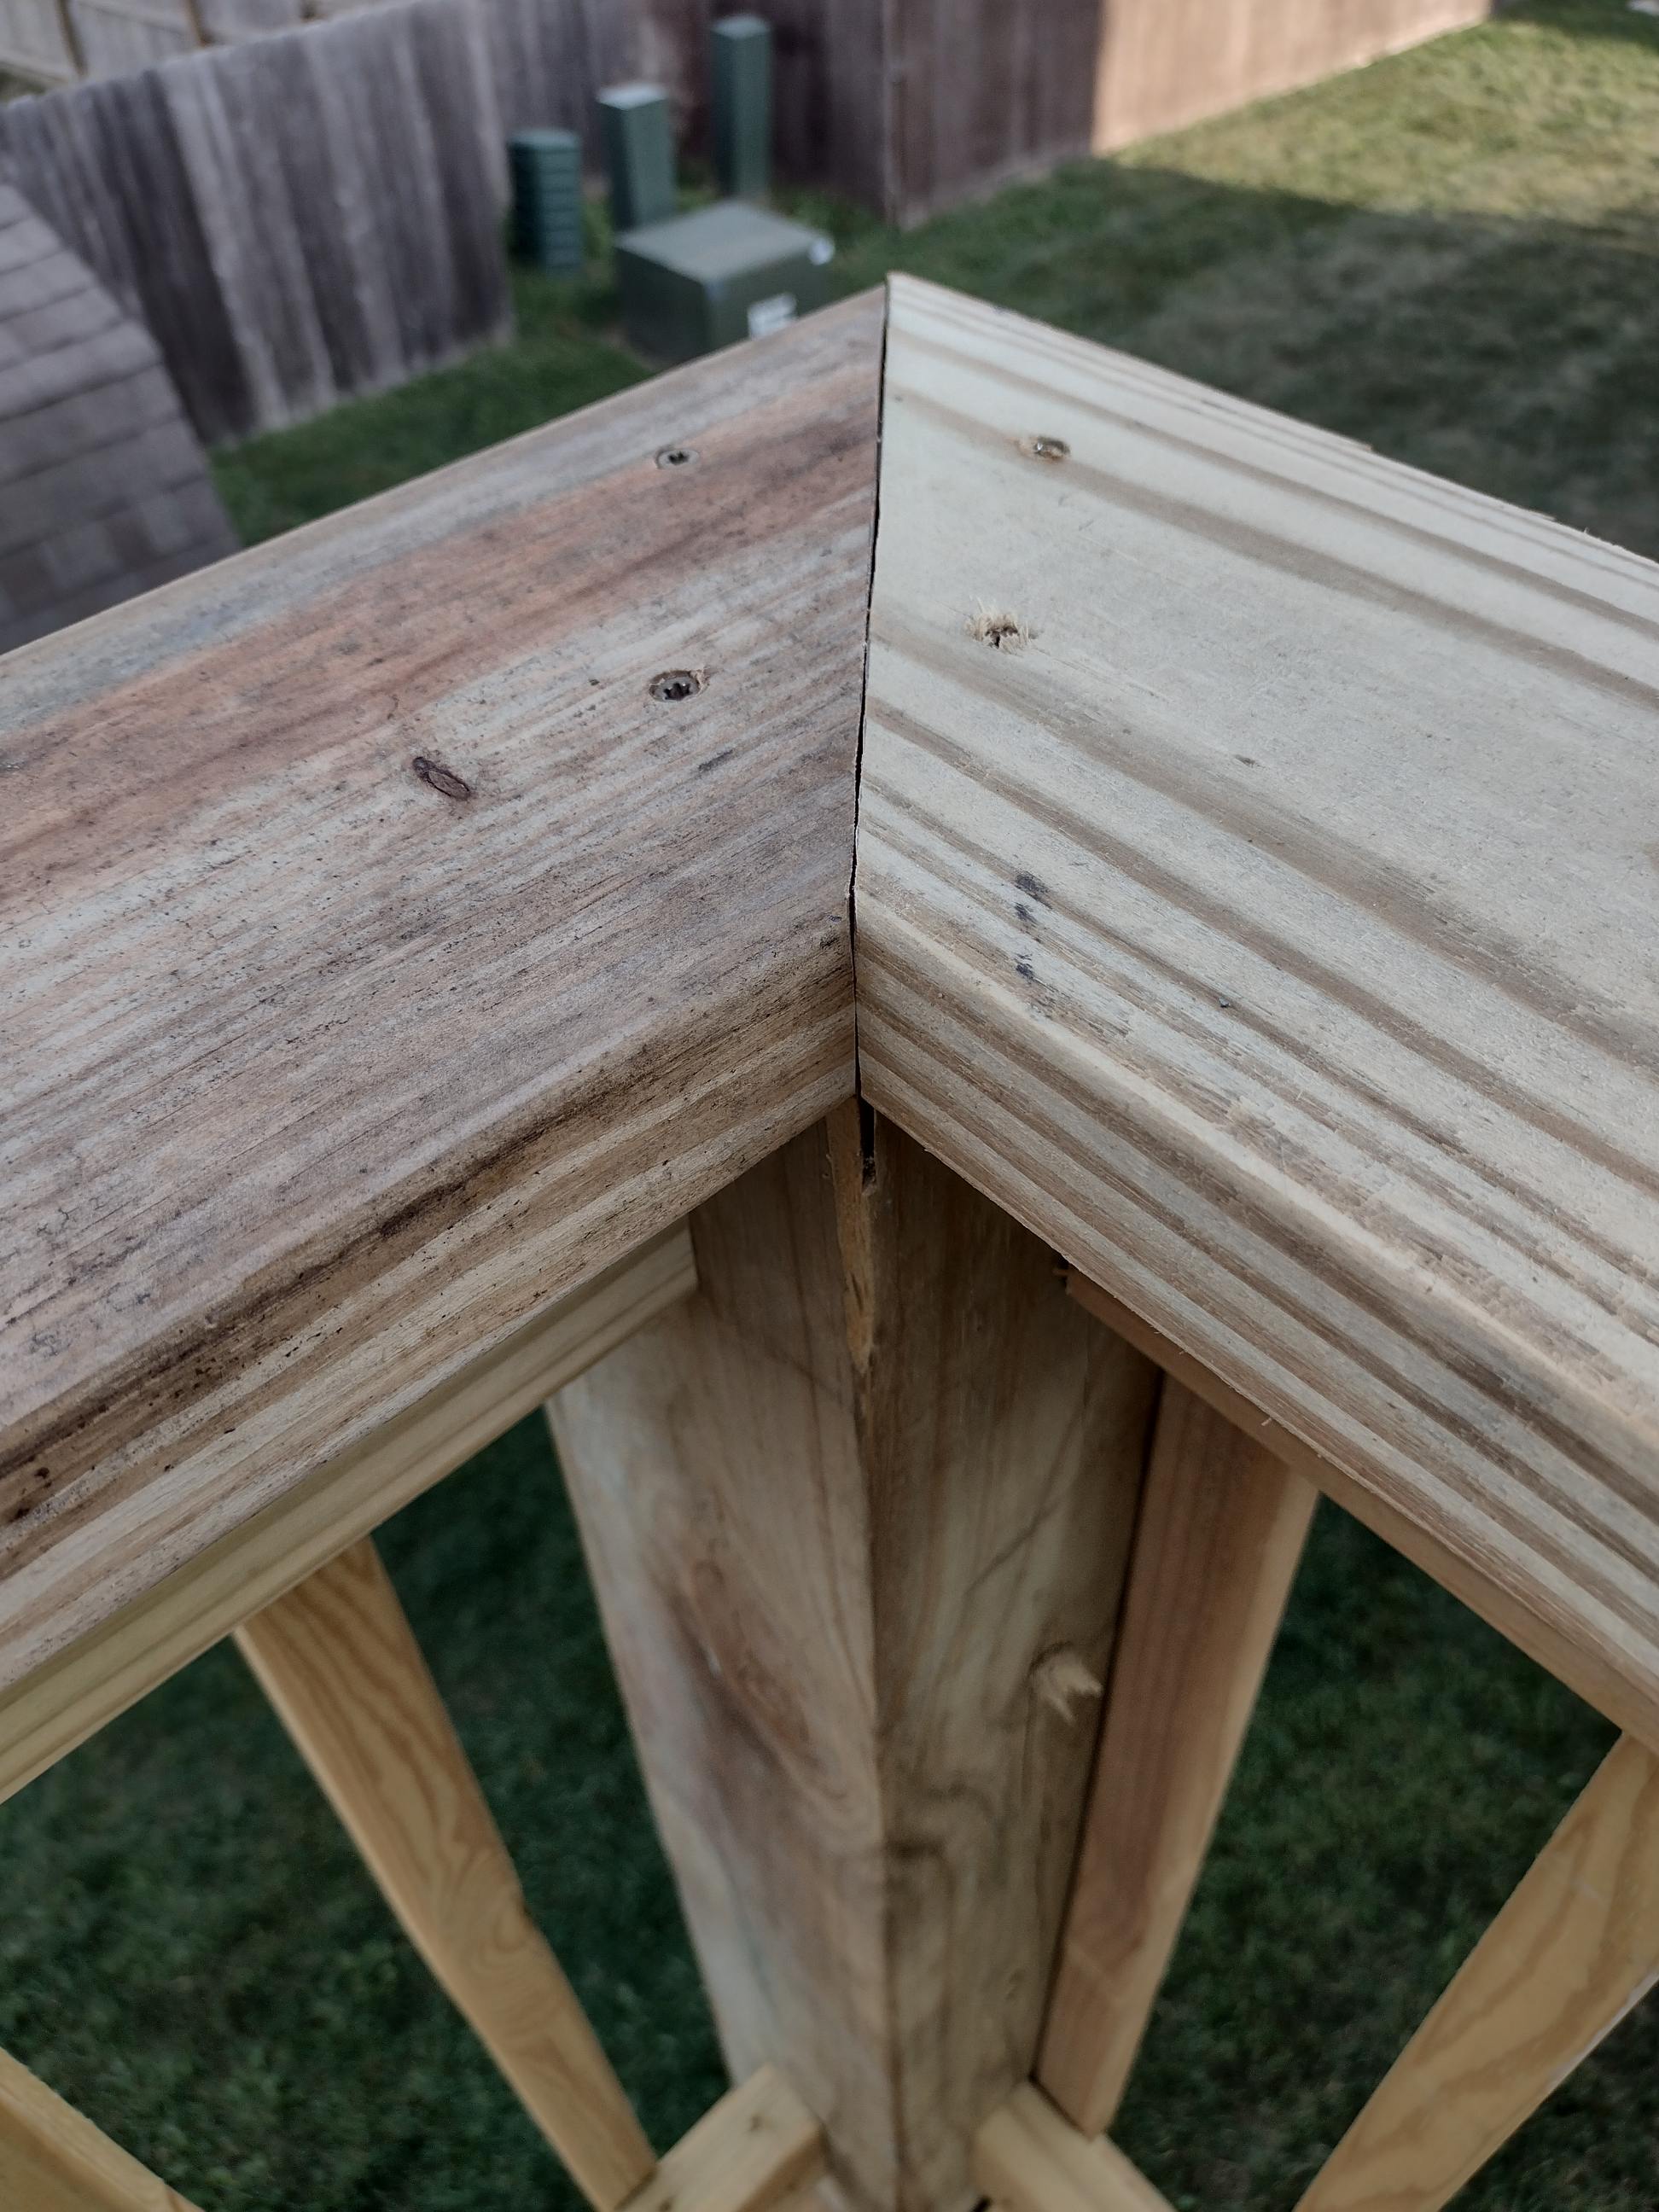 After a few months
Nothing was cut wrong. Here's what actually happens: treated lumber is always wet. Even the good stuff, Pro Lumber, YellaWood, comes off the rack carrying water, and it shrinks as it dries. A miter is two angled end-grain faces meeting. When both pieces shrink, the joint opens. The better the cut, the more obvious the gap, because there was nothing there to begin with.
Our fix is simple. We cut a small piece of composite decking, lay it over the miter, fasten it, and set the post cap on top of that. The composite doesn't move with the seasons the way the treated rail does, so the joint stays covered permanently, and the cap gets a clean surface to sit on.
Some homeowners don't want post caps. Design preference, or they don't want the extra cost. So we tell them what's going to happen, we'll show them photos of what an open miter looks like at three months, and then we build it the way they asked.
And some of them call in the fall to complain about the corners.
I'm not telling that story to make anybody look bad. I'm telling it because it's a real trade-off and you should get to make it with your eyes open. Wood moves. You can cover the joint or you can accept the gap. There isn't a third option where a treated wood miter stays tight forever, and anyone who tells you otherwise hasn't gone back to look at their own work.
Why Aluminum Balusters Come Loose (It's Not the Balusters)
The most common baluster problem we see is aluminum balusters going loose in a wood railing. And it gets blamed on the aluminum every time.
It's not the aluminum. It's the bottom rail.
On a long section, a wood bottom rail with nothing supporting it will bow downward, from its own weight, from moisture, from the same shrinkage that opens the miters. As it sags, it pulls away from the balusters sitting in it. They loosen, they rattle, and eventually the spacing itself starts to shift.
The fix is a crush block: a block set between the bottom rail and the deck surface, carrying the rail from underneath so it can't bow. On any section over 5 feet, that's not optional. We install them on every run that needs one, and it's one of the most consistently skipped details in the trade, partly because it's invisible in the finished product, and partly because nothing goes wrong for the first couple of years.
Baluster Spacing, and Why We Don't Build to the Limit
The gap between balusters has a hard ceiling of 4 inches. That number exists because of what can fit through a smaller opening than an adult expects, and inspectors carry a sphere to check it.
Here's our standard:
| Measure | Our layout | Why |
|---|---|---|
| Deck sections | 4" on center | Standard layout for level runs |
| Stairs | 4½" on center | Rake geometry is different from level, stairs get laid out separately |
| Actual gap target | 3.5" | A half inch inside the ceiling, so wood movement can never push a gap out of compliance |
That last row is the part worth sitting with. There's a difference between a railing built to the limit and a railing built with margin. A layout that measures exactly 4 inches on the day of inspection is legal on that day. Wood shrinks. Rails settle. Build to 3.5 and you've got room for all of it.
Nobody makes you do that. We do it because it costs a few extra balusters and buys a railing that's still compliant in a decade.
One more note on stairs, since it's the section every railing guide skips entirely: stair railing costs more than level railing. Every time. The layout is different, the cuts are different, and the labor is higher. If you're comparing bids and one contractor's stair number looks suspiciously close to their deck number, ask why.
Two Things to Think About Before You Pick a Style
Kids will climb horizontal cable and horizontal bars. Without fail. Not might, will. A horizontal infill is a ladder to a small child and they will treat it as one. We bring this up with every client considering horizontal cable or horizontal bar systems, because it's the kind of thing that's obvious the first time you watch it happen and never occurs to anyone beforehand. If you've got young kids or grandkids in the house, factor it in. Vertical infill doesn't have this problem.
If you might ever screen in your porch, your railing choice is already a screen decision. Wood railing and a screen system can coexist, this isn't an either/or. But there's a real cost to it that nobody mentions up front, and in some situations it genuinely won't work at all.
The cost is maintenance. Once screen is installed, you've got wood sitting inches from screen fabric that still needs to be stained or painted on a cycle. You can't refinish it without getting product on the screen, so what used to be a routine job becomes a careful, slow one, masking, cutting in, working around fabric you can damage. Most homeowners don't think about it until the first time they have to do it.
The situation where it stops being a trade-off and becomes a hard no is profile. A wide wood top rail can physically occupy the space where the screen track has to land. When that's the case, the railing isn't a preference anymore, it's a clearance problem, and the rail comes out.
That's the one we run into most. It isn't the only one. Existing structures vary more than people expect, decks get built and modified over decades by different hands, and we've seen configurations nobody would design on purpose. There's no honest way to publish a complete list of what will and won't work with a screen system, because the list is as long as the number of ways a porch can be framed. What I can tell you is that it's a question with a clear answer once someone looks at your actual structure, and it's worth asking before you buy railing rather than after.
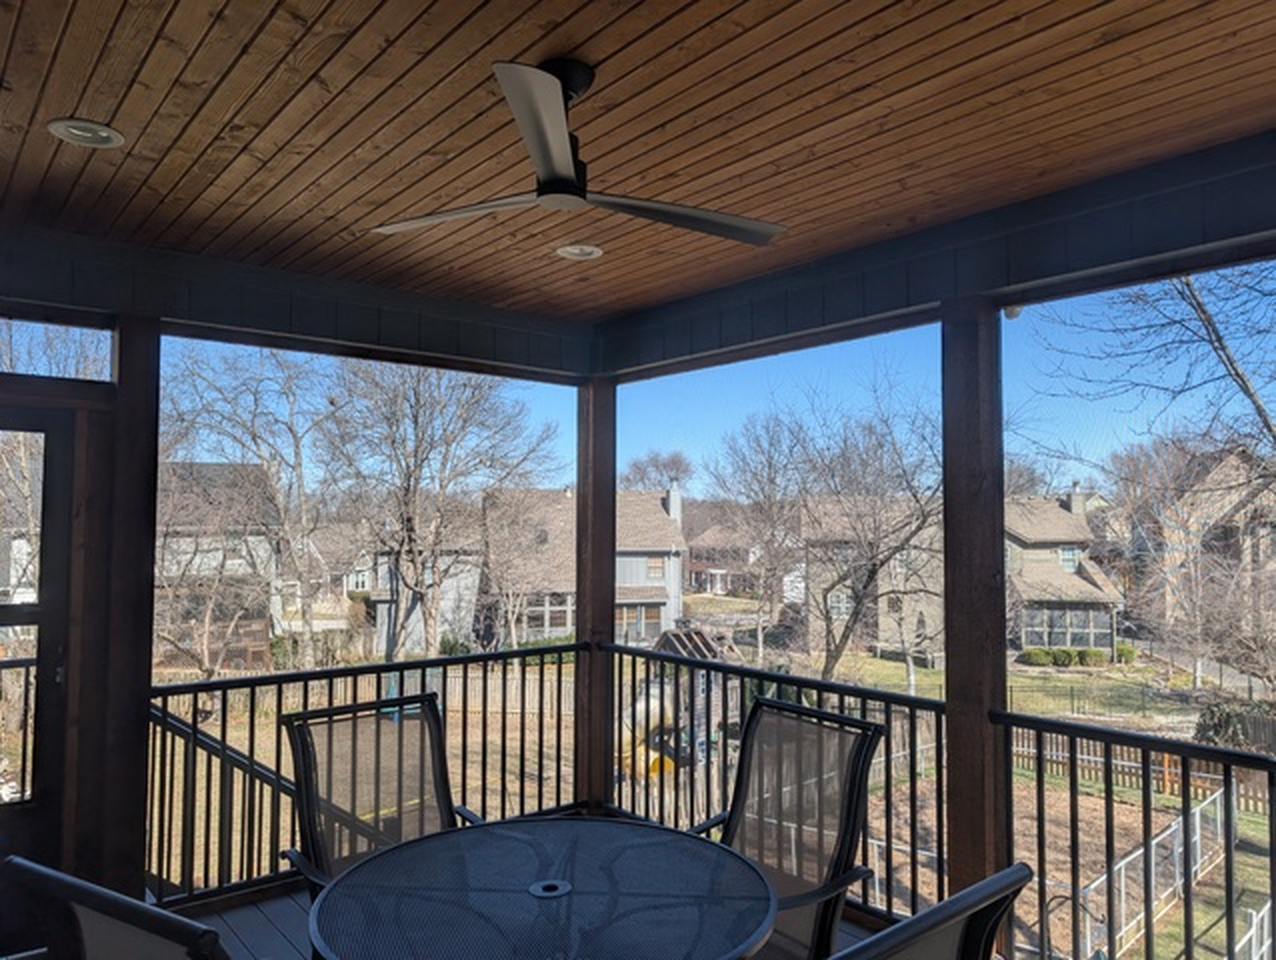
That's what happened on a job in Kansas City recently. The existing wood guardrail was in the way of the ScreenEze system going in, so we replaced it with a Westbury Tuscany aluminum system. Narrow profile, and nothing to refinish, ever.
So if a screen room is anywhere in your five-year plan, it's worth pricing aluminum railing now rather than buying railing twice. Not because wood can't work, because aluminum removes both problems permanently.
What Certification Actually Buys You on a Railing
We've installed DekPro, Fortress, Deckorators, and Westbury. Honest assessment: the finish quality is good across all of them and from a safety standpoint they perform about the same. I'm not going to tell you one brand of aluminum railing is dramatically safer than another, because it isn't true.
Where Westbury has genuinely stood out for us is selection, a very large range of ready-to-build systems, plus the flexibility to do some very nice custom work when a project calls for it.
But here's the part that actually affects you financially, and it has nothing to do with the metal.
Westbury railing carries a Lifetime Limited Warranty from Digger Specialties covering defects in materials and workmanship. Read the exclusions, though, and you'll find this: cost of installation or removal, freight, labor and similar costs are not covered. Neither is damage caused by faulty installation.
So the standard warranty hands you parts. If a section fails in year six, you get a replacement section, and you pay someone to come take the old one out and put the new one in.
Acumen is a Westbury Certified Master Pro, which is a certification earned through manufacturer training and testing. What that adds is a 7-year labor warranty, registered per project, on properly installed and completed jobs. We register it when a customer asks for it.
That's the same argument we've made about contractor certifications and your home warranty and about what composite deck warranties actually cover: the product warranty and the labor warranty are two different documents, and labor is the expensive one.
The registration detail almost nobody mentions. The Westbury lifetime warranty requires a registration card to be completed and returned to the manufacturer, and the original owner has 30 days from purchase to do it. Miss that window and the coverage isn't there when you need it. Claims also have to be reported within 30 days of discovering the defect. If you have Westbury railing and you never filled out a card, that's worth checking on today rather than the day something fails.
One clarification while we're being precise about credentials: our Fortress certification is Fortress Framing, steel framing, not railing. We install their railing; we're not certified in it. Westbury is the railing system we're certified in.
Replacing Railing on a Deck You Already Have
This comes up a lot: the deck is fine, the railing is tired, can we just swap it?
Usually yes, with one condition that catches people off guard. Aluminum post applications require specific blocking to get the material thickness the system needs, and that blocking almost certainly isn't in your existing deck. Nobody installs blocking for a railing system that wasn't planned.
Whether that's easy or painful comes down to one thing: can we get underneath?
- Deck at least 3 feet off the ground, we install the blocking from below. Fairly easy retrofit, no disruption to the deck surface.
- Deck lower than 3 feet, we have to pull deck boards to reach the framing from above, then put them back. That's more labor, and if you have composite decking that's been down a few years, the boards coming off and going back on is its own conversation.
Neither is a dealbreaker. But it's the difference between a straightforward job and a bigger one, and you should know which one you're in before you get a bid.
Getting a Real Number
We built an instant estimate tool that gives you an itemized deck estimate from your dimensions, no phone call, no sales pressure. Railing is priced in it as a line item across a range of options, so if railing is what you're after, build out your deck in the tool and read the railing line on the estimate.
Want a number on railing? Enter your deck's width, length, and height, pick your railing option, and the itemized estimate breaks the railing out as its own line. Get your estimate here.
Two things the tool doesn't handle yet, and I'd rather tell you than have you find out: railing along the front of a house running beside a sidewalk, and railing around decks with a switchback landing. Both have geometry the calculator can't resolve honestly. Those need an actual conversation, and we're happy to have it.
Also worth knowing, and this is where most cost comparisons mislead people: manufacturer sites rate railing cost by product price. Installed cost reorders the list. Pre-assembled aluminum panels go up fast. Cable is slow, per-cable labor. Wood is cheap material and slow labor, and then it costs you again every few years in stain. Stairs cost more than level runs in every system. Product price alone won't tell you what you're going to pay.
What to Ask Before You Sign Anything
- How are the railing posts attached? This is the whole question. You want to hear about blocking and connection to framing. If the answer is vague, or if anyone mentions attaching posts to siding, walk, that one decision costs you the structure, your ability to maintain that wall, and your siding warranty.
- What size posts? We use 6×6. If someone's quoting 4×4, ask what the blocking looks like behind it.
- Are crush blocks included on runs over 5 feet? Most people you ask won't know what you mean. That itself is informative.
- What's the baluster gap, and is it built to the limit? Four inches is the ceiling. Ask what they actually lay out to.
- Is stair railing priced separately? It should be. It costs more.
- Are you certified in the railing system you're quoting, and does that add a labor warranty? Parts warranties are standard. Labor warranties come from certification, and only if someone registers them.
- If you might screen it in later, say so now. It changes the railing you should buy today.
Acumen Renovations builds and replaces deck railing across the Kansas City metro, posts blocked properly, crush blocks where they belong, and spacing laid out with margin instead of built to the limit.
If you're planning a deck or looking at a railing that's seen better days, we're happy to talk through what's actually going on behind it. Reach out here.